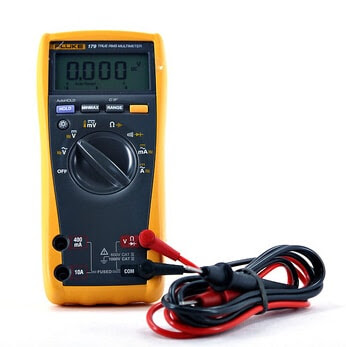
How to measure Capacitance with Fluke 179?
The process of Measurement of capacitance of a capacitor in a circuit with fluke 179 true rms multimeter is similar to the capacitance measurement using digital multimeter
Though there is a chance that there are some additional steps due to the difference in company and function of the multimeter.
Steps for Measuring Capacitance with fluke 179:
The steps for the capacitance measurement are as follows:
- Point the dial to

- Inside the com jack insert black lead.
- Inside the VΩ jack insert Red lead.
- Connect firstly black lead to the circuit and after that Red lead.
- Set the basic accuracy up to 0.9% + 1 digit.
- Press
 this button for capacitance measurement.
 - Note the measurement display on the screen. When reading is noted down removes firstly red lead from the circuit and after removing black lead.
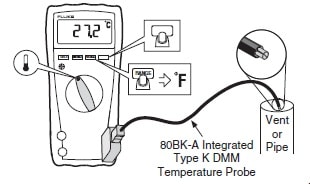
How to measure Temperature with Fluke 179?
Steps for measuring Temperature:
The steps for the Temperature measurement are as follows:
- Point the dial to

- Inside the com jack insert black lead.
- Inside the VΩ jack insert Red lead.
- Connect firstly black lead to the circuit and after that Red lead.
- Use this mode for increased resolution on small voltages.
- Set the maximum resolution of 0.1 mV.
- Press
 this button for measurement of temperature in Fahrenheit & Celsius.
 - Note the measurement display on the screen. When reading is noted down removes firstly red lead from the circuit and after removing black lead.
How to test Continuity with Fluke 179?
Steps for continuity testing:
The steps for the continuity test are as follows:
- Point the dial to

- Inside the com jack insert black lead.
- Inside the VΩ jack insert Red lead.
- Connect firstly the black lead to the circuit and after that the Red lead.
- When meter measures the resistance less than 25 Ω, the meter will sound the beeper.
- Uses an audible signal to indicate the shorts.
- The meter detects the intermittent open and short lasting as little as 250 µs.
- Press
 this button for diode test.
To know about the functions in the demo, click on the buttons of the image. For each button pressed on the image, you will get content on the right side of the image.
Hope this tutorial helps you. If you have any doubt or question, feel free to ask.


