

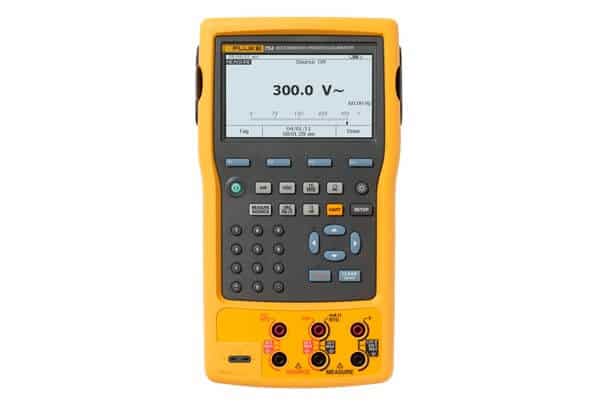
Fluke 754 process calibrator is one of the most demandable calibrator in the eyes of professional Technicians due to its HART Communication capability.
This makes it efficient in measuring electrical measurements in dual mode.
- Measure Mode
- Source Mode or Sourcing Mode
In our last article we explain how to measure electrical parameters, Temperature and Pressure in Measure mode.
Here we are going explain how can you use Source Mode in Fluke 754 calibrator.
How to use source mode to measure electrical parameters?
Using Fluke 754 Source mode is not difficult. Though it is somewhat different than other process calibrators available in market.
The Steps for sourcing electrical parameters are:
- Insert Red lead inside the V/Ω/RTD jack for voltage, resistance measurement and in mA/Ω/RTD jack for current measurement.
- Insert black lead inside the 30V max jack for voltage, resistance measurement and in 50V max jack for current measurement.
- Connect firstly the black lead to the circuit and after that the Red lead.
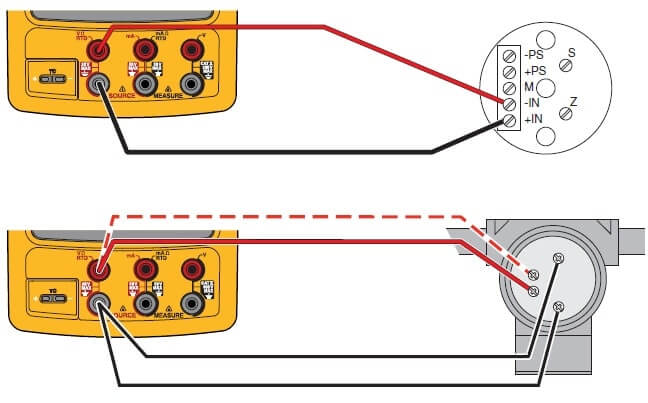
- Connect the calibrator to the transmitter loop terminal as shown in the figure.
- Press VDC labelled button for dc voltage, mA for current, VAC/Hz once for ac voltage and twice for frequency, Ω for resistance.
- Record the necessary output value and push enter labelled button.
- To change the output value, record a new value and push enter labelled button.
- Press clear (Zero) labelled button to set the output value in the present source function.
- Press clear (Zero) labelled button twice to turn off sourcing completely.
- Note the measurement display on the screen. When you have noted the readings, first remove the red lead from the circuit and then remove the black lead to avoid any electrical shock or damage to the device.

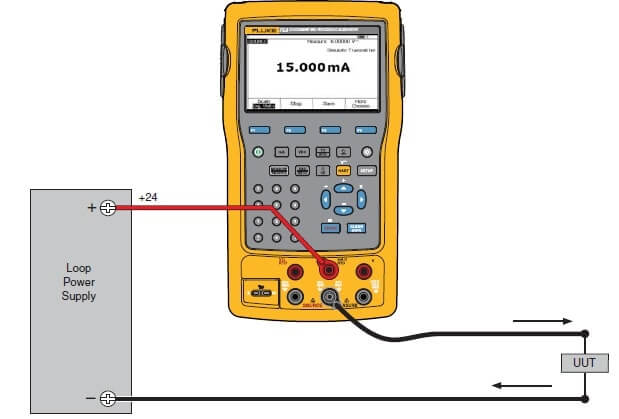
How to simulate 4 to 20 mA transmitter with Fluke 754 documenting process calibrator?
Steps for simulating 4 to 20 mA transmitter are:
In this, the product can be configured as a load on a current loop through the source mA function. You have to follow such steps for simulation:
- Insert Red lead inside the V/Ω/RTD jack for voltage, resistance measurement and in mA/Ω/RTD jack for current measurement.
- Insert black lead inside the 30V max jack for voltage, resistance measurement and in 50V max jack for current measurement.
- Connect the other end of leads to the 24V loop power source.
- When mA labelled button is pressed, the display shows to select Source mA or simulate transmitter.
- When you source mA the product is sourcing current, and when you simulate transmitter the product is sourcing a variable resistance to keep the current to the specified value.
- Connect an external loop supply to the positive mA jack.
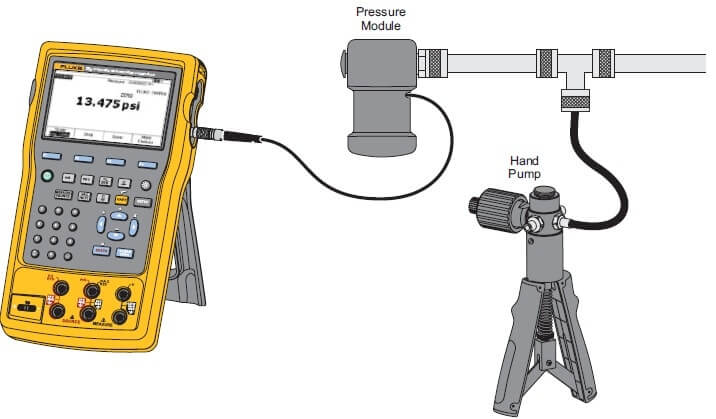
How to source pressure with Fluke 754 documenting process calibrator?
The Calibrator sources pressure by measuring pressure supplied by a pump or other sources and displaying the pressure in the source field. Always use this function to calibrate instruments where a pressure source or differential pressure measurement is necessary.
Steps for sourcing Pressure are:
- Firstly connect a pressure module to the calibrator as shown in the figure.
- The threads on the pressure modules accept standard ¼ NPT pipe fittings.
- If necessary use the ¼ NPT to ¼ ISO adapter.
- Press measure/source labelled button to select source mode.
- Calibrator automatically senses which pressure module is attached by pressing

- As given in module instruction sheet, zero the pressure module.
- Depending on module type modules can have the different zeroing procedure.
- To change the pressure display units to psi, inHg, inH2O, ftH2O, mH2O, bar, pa, inH2O@60 °F, mmg or kPa etc you may follow these steps:
- Push setup labelled button.
- Push Next page twice.
- Push the Enter labelled button or the choices softkey with the cursor on pressure units.
- Set the pressure units with up and down arrow function keys.
- Push again the enter labelled button.
- Push the Done softkey for change the pressure display unit.
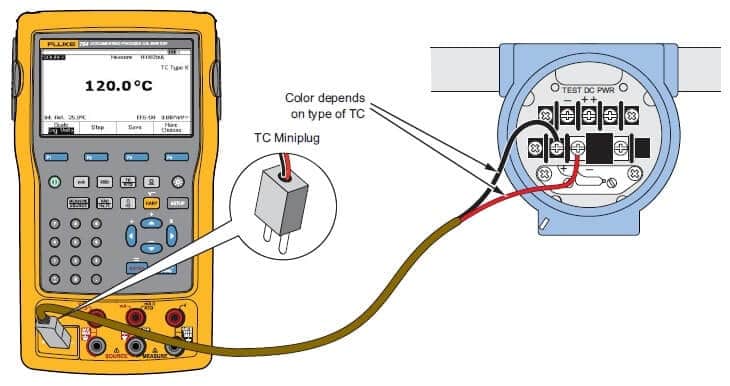
How to measure Temperature using Thermocouple simulating with Fluke 754 documenting process calibrator?
Steps for measuring temperature using Thermocouples are:
Calibrator supports thirteen standard thermocouples each identified with an alpha character i.e., E, N, J, K, T, B, R, S, C, L, U, XK, or BP. Steps for measuring temperature with thermocouples are:
- Attach the thermocouple leads to the TC miniplug and insert miniplug into the TC input /output terminal of the calibrator.
- If necessary, press Meas/Source labelled button for source mode.
- Press TC/RTD labelled button.
- Press Enter labelled button to select the TC sensor type.
- The display asks you to select the thermocouple type.
- Select the thermocouple type by pressing up/down arrow functions key.
- To select Linear T or Linear mV press up/down arrow functions key followed by Enter labelled button.
- Record the temperature to simulate as shown on display and press Enter labelled button.
How to measure Temperature using RTD with Fluke 754 documenting process calibrator?
Steps for measuring temperature using RTD’s are:
- If necessary, press Meas/Source labelled button for source mode.
- Press TC/RTD labelled button.
- Select RTD type by pushing down arrow key and enter labelled button.
- To select the necessary RTD type, push up and down arrow function key.
- Push enter labelled button.
- The product tells you to use the keypad to enter the temperature to simulate.
- Input the temperature and then push the enter labelled button.
Hope you all like this article. We always appreciate your suggestions.
One Comment
Comments are closed.