Fluke 726 precision multifunction process calibrator is used to measure Electrical parameters like Temperature and pressure etc in two modes. If you want to know a brief description of this calibrator you may follow this Fluke 726 calibrator introduction. Here we are going to explain you parameter measurements in Measure mode.
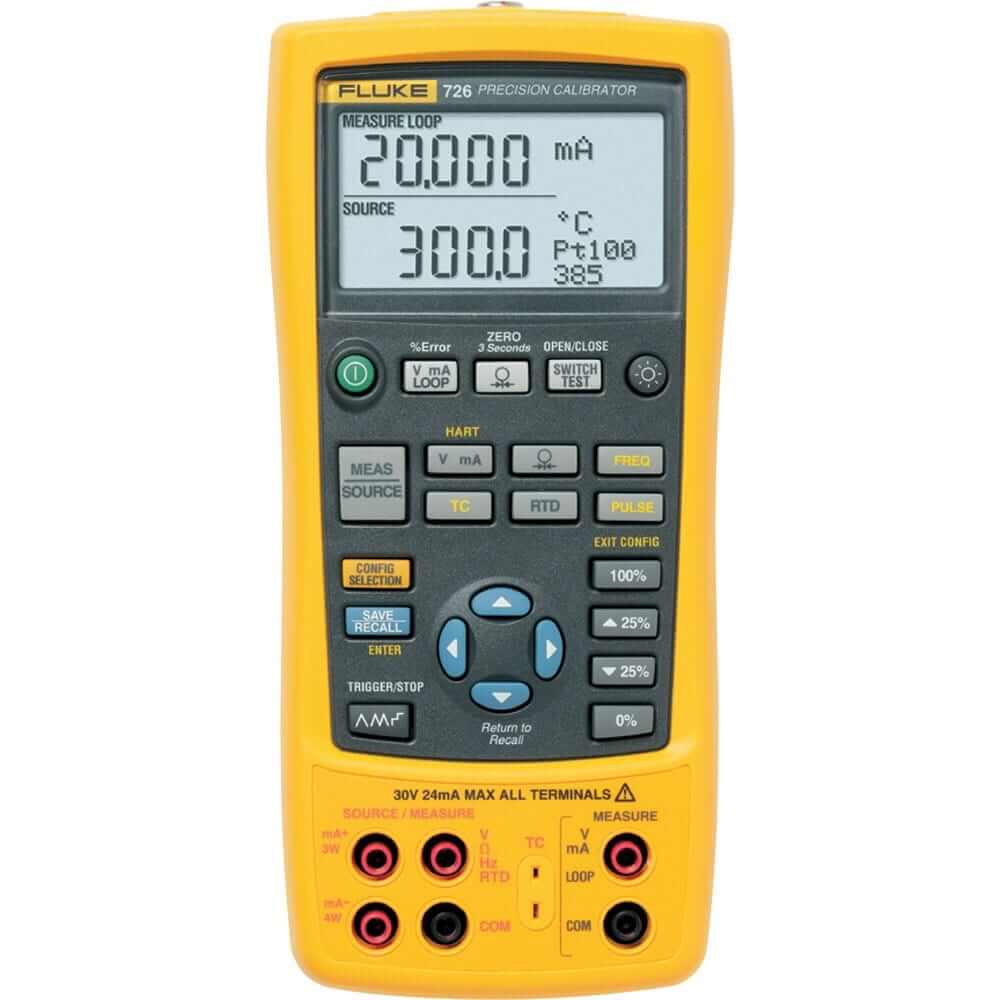
Electrical Parameter Measurements using Fluke 726 precision multifunction process calibrator
It basically works in two modes, one is Measure mode & other is Source mode to test and calibrate almost any instrument.Here we explain measurements in measure mode.
How to measure voltage or current with Fluke 726 multifunction process calibrator?
Steps for measuring voltage or current are:
(i) Measuring voltage or current (Upper display)
To measure the current and voltage output of a transmitter or to measure the output of a 700 series pressure module, use the upper display and proceed as follows:
- To select volts or current press V/mA/loop labelled button.
- Ensures that loop button should not be on.
- Inside the V/mA/loop jack insert the Red lead.
- Inside the COM jack insert the black lead.
- Connect firstly black lead to the circuit and after that Red lead.
- Note the measurement display on the screen. When you have noted the readings, first remove the red lead from the circuit and then remove the black lead to avoid any electrical shock or damage to the device.
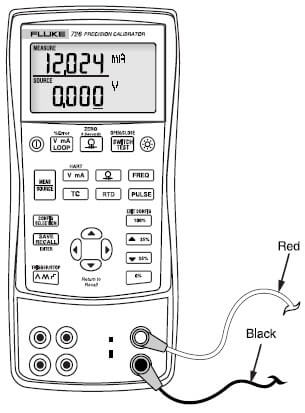
Measuring Parameters with loop power
To test a transmitter when it is disconnected from plant wiring, a loop power function is used which activates a 24V supply in series with the current measuring circuit. To measure current with loop power follow these steps:
- Inside the V/mA/loop jack insert Red lead.
- Inside the COM jack insert black lead.
- Connect firstly the black lead to the circuit and after that the Red lead.
- Connect the calibrator to the transmitter current loop terminal as shown in the figure.
- When the calibrator is in the current measurement mode then press V/mA/loop labelled button
- LOOP start appearing which turns on the internal 24V loop supply.
- Note the measurement display on the screen. When you have noted the readings, first remove the red lead from the circuit and then remove the black lead to avoid any electrical shock or damage to the device.
Note: When HART mode resistor is selected, the 250 Ω resistor is switch on both mA channels.

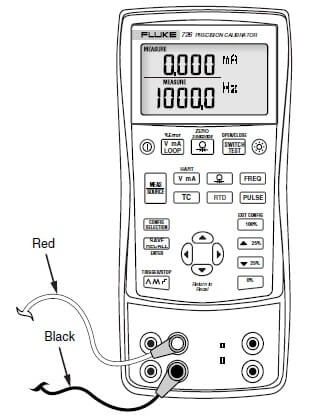
(ii) Measuring voltage or current (Lower display)
To measure the current and voltage output of a transmitter, use the Lower display and proceed as follows:
- Inside the V/Ω//Hz/RTD jack insert Red lead.
- Inside the COM jack insert black lead.
- Connect firstly the black lead to the circuit and after that the Red lead.
- If necessary, press Meas/Source labelled button for measure mode (lower display).
- For dc voltage or current press V mA labelled button and for resistance press RTD labelled button and for frequency press Freq labelled button.
- Note the measurement display on the screen. When you have noted the readings, first remove the red lead from the circuit and then remove the black lead to avoid any electrical shock or damage to the device.
How to measure Temperature with Fluke 726 multifunction pressure calibrator?
We measure temperature either by using a thermocouple or by using RTD’s.
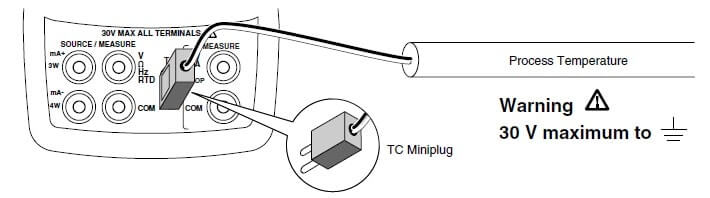
(i) Measuring Temperature using Thermocouples:
Calibrator supports thirteen standard thermocouples. Steps for measuring temperature with thermocouples are:
- Attach the thermocouple leads to the TC miniplug and insert miniplug into the TC input /output terminal of the calibrator.
- If necessary, press Meas/Source labelled button for measure mode.
- For TC display press TC labelled button.
- For the selection of thermocouple type, press this TC labelled button continuously.
- For measuring temperature in Celsius or Fahrenheit, press °C or °F labelled button.
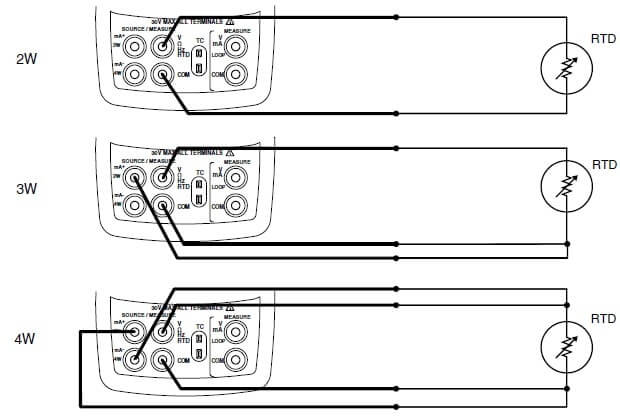
(ii) Measuring Temperature using RTD’s:
Steps for measuring temperature with RTD’s are:
- If necessary, press Meas/Source labelled button for measure mode.
- For RTD display press RTD labelled button.
- For the selection of RTD type press this RTD labelled button continuously.
- Press button to select 2-, 3-, 4- wire connections.
- Attach RTD to the Input terminals as shown in set-up below.
- For measuring temperature in Celsius or Fahrenheit, press °C or °F labelled button.
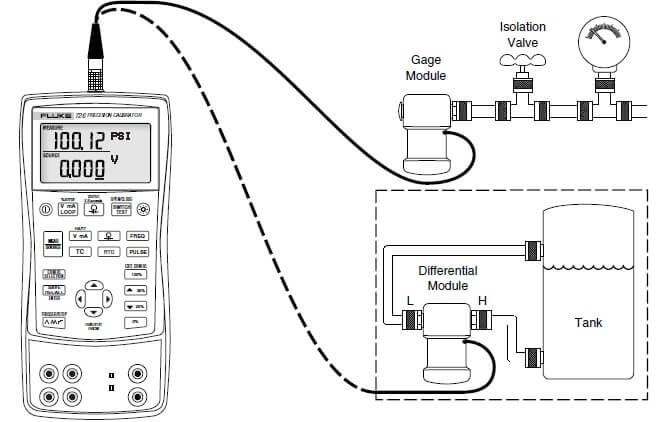
How to measure pressure with Fluke 726 multifunction pressure calibrator?
Steps for measuring Pressure are:
- Firstly connect a pressure module to the calibrator as shown in the figure.
- The threads on the pressure modules accept standard ¼ NPT pipe fittings.
- If necessary use the ¼ NPT to ¼ ISO adapter.
- Calibrator automatically senses which pressure module is attached by pressing either

- As given in module instruction sheet, zero the pressure module.
- Depending on module type modules varying in zeroing procedure but all requires pressing for 3 seconds.
- To change the pressure display units to psi, mmHg, cmH2O@4 °C, cmH2O@20 °C, inH2O@4 °C, inH2O@20 °C, inH2O@60 °F, mbar, bar, kg/cm2, or kPa continuously press .
Hope you all like this article. For any suugestions please comment below. We always appreciate your suggestions.
One Comment